


How to Create Visual Schedules
A how-to guide including a list of materials, instructions, and photos.


As I showed in my previous article, visual schedules can help anyone. These directions are written primarily with teachers in mind, but can also be used by adults with disabilities. To recap, here are some benefits of using a schedule:
Increases independence
Decreases anxiety because people know what is happening next.
Increases productivity because anxiety is lower.
Can be used as a tool to prepare people for changes to their routine, such as assemblies or appointments.
In this article, I will show you how to make them.
Before I provide the instructions, you should be aware that numerous variations can be made to schedules to make them suitable for the user. I will include detailed instructions for the type of schedule that uses the most materials. After that, I will discuss several variations that you can do to make them suit you.
Materials:
Sturdy cardstock
Self-adhesive velcro strips (I found that 5/8 inch width worked best)
Self-adhesive velcro dots (I found that 5/8 inch dots worked best)
Scissors
Packing tape or a laminating machine
Picture icons (I prefer icons that are 1.5 inches square). You can create icons by photographing an object that represents the activity and printing it off, or you can use an internet service. Since I was making a large number of icons, I used an internet service called Lesson Pix. LessonPix (lessonpix.com) costs $36 per year and offers thousands of icons to choose from. It allows you to select the icons you want, select what size you want them to be, and create a PDF that you can print off. You can also upload your own photos to the LessonPix site so that you can print them off as icons. (I do not get a commission from LessonPix if you buy a subscription and have no association with the company other than that of a customer.)
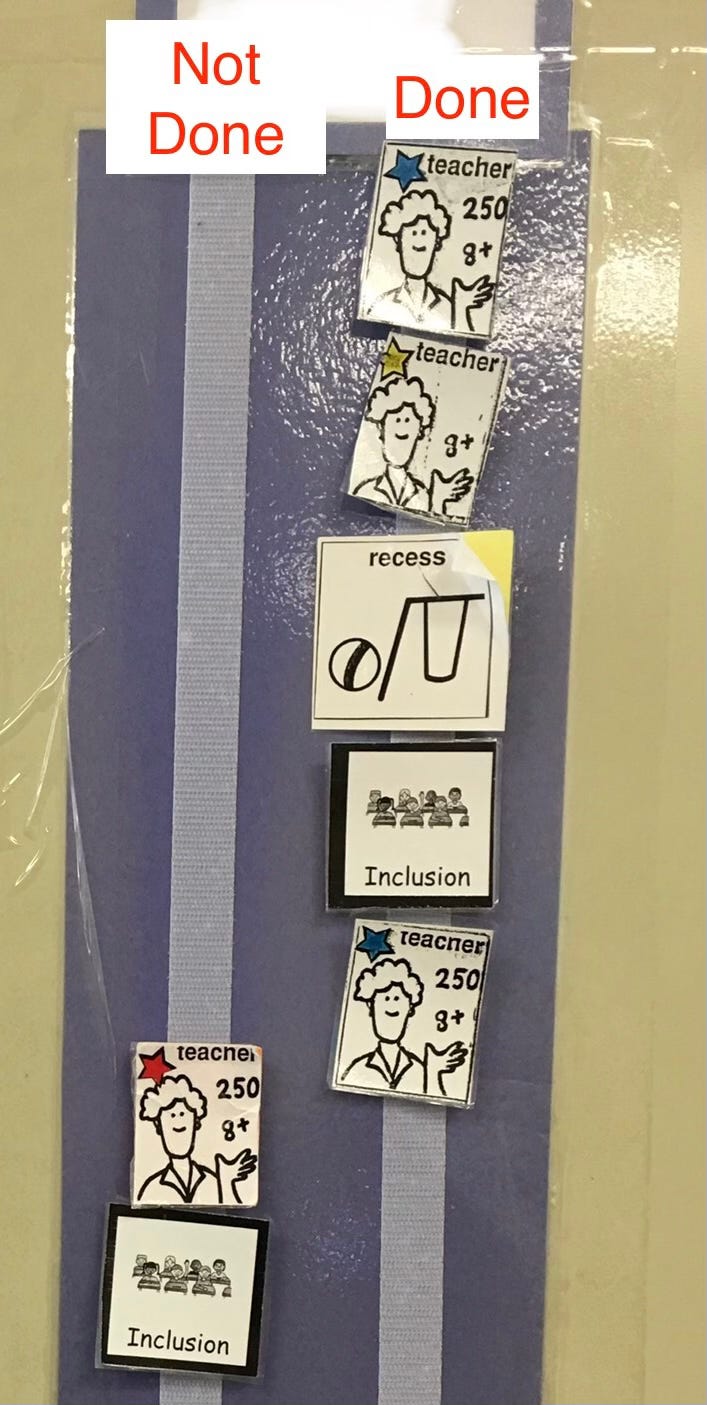
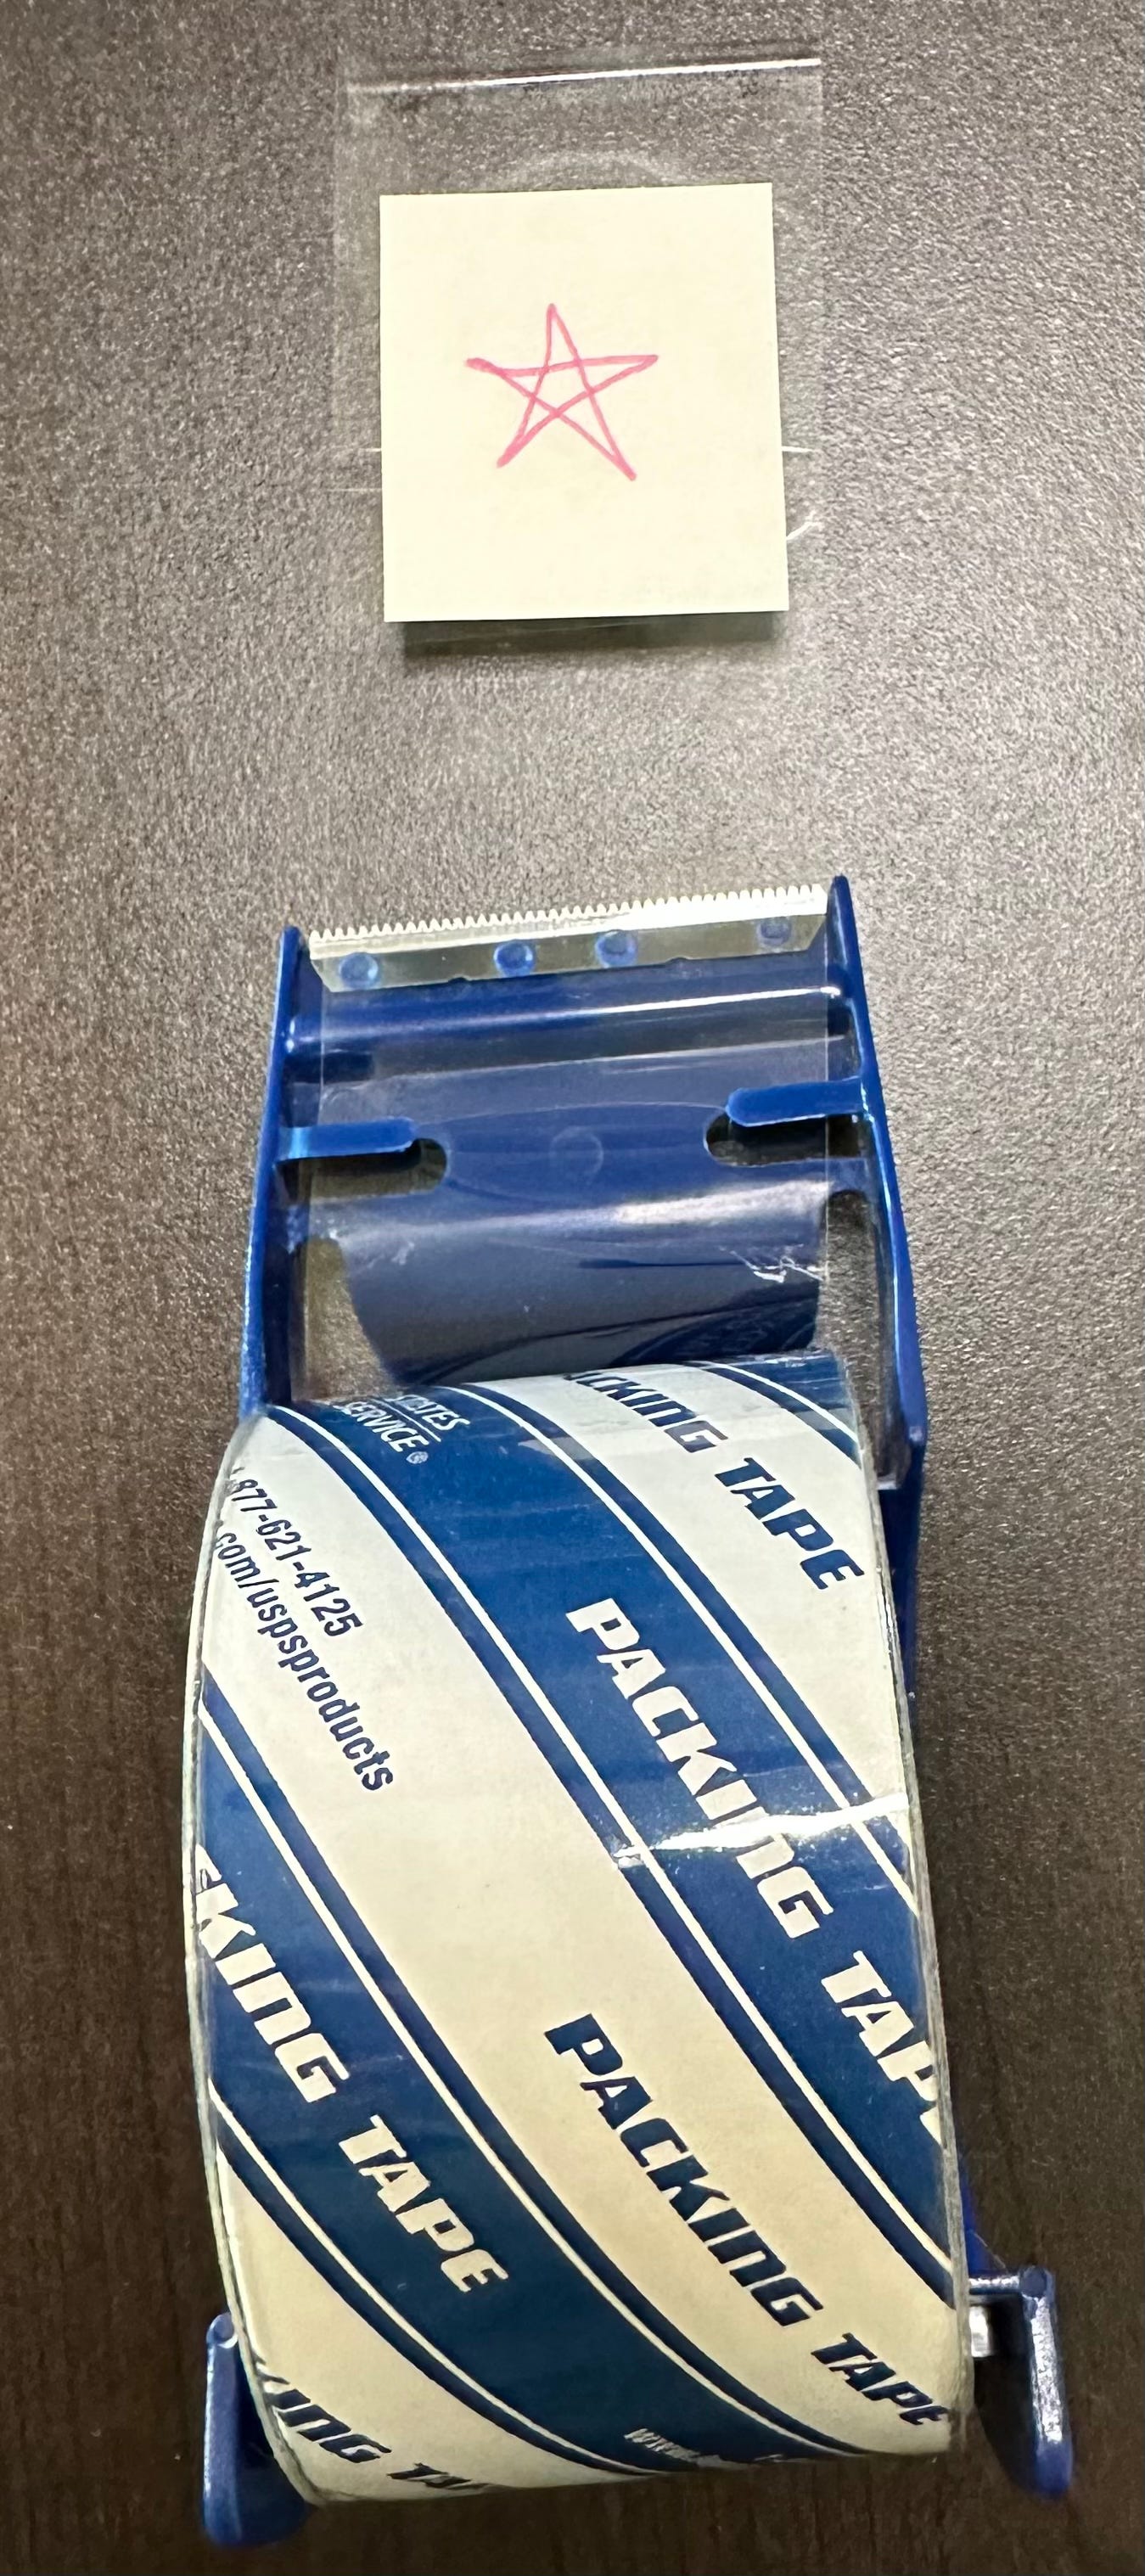
Here is a photo of the type of schedule I will be showing you how to make:
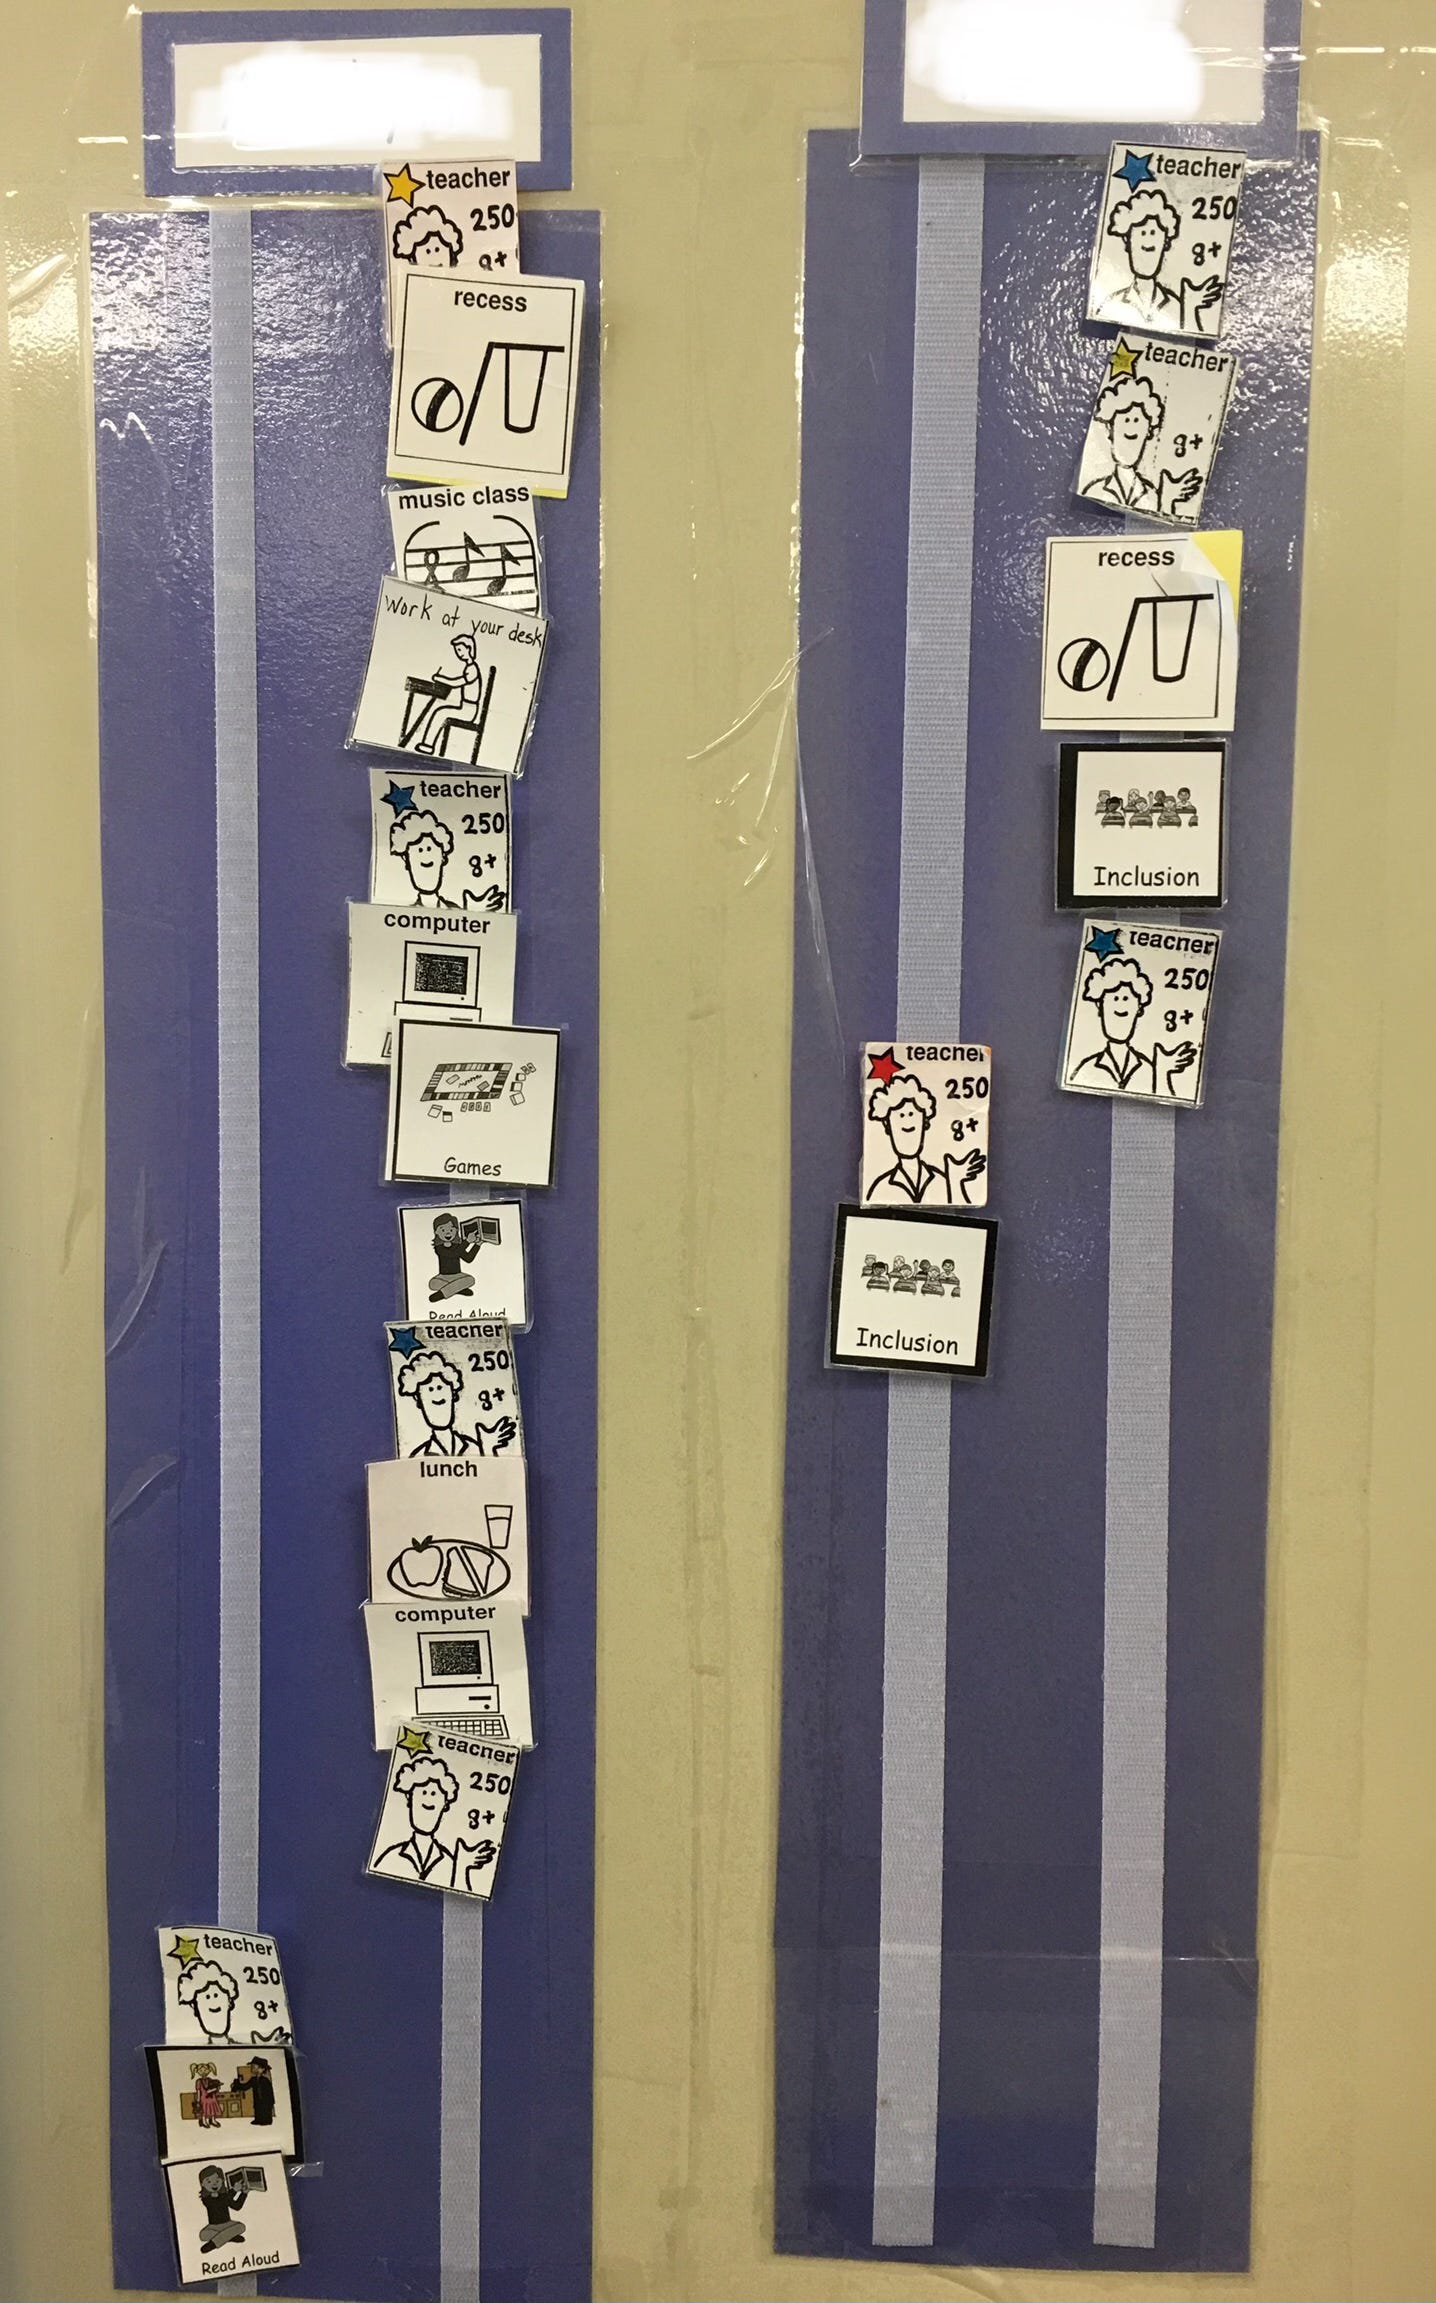
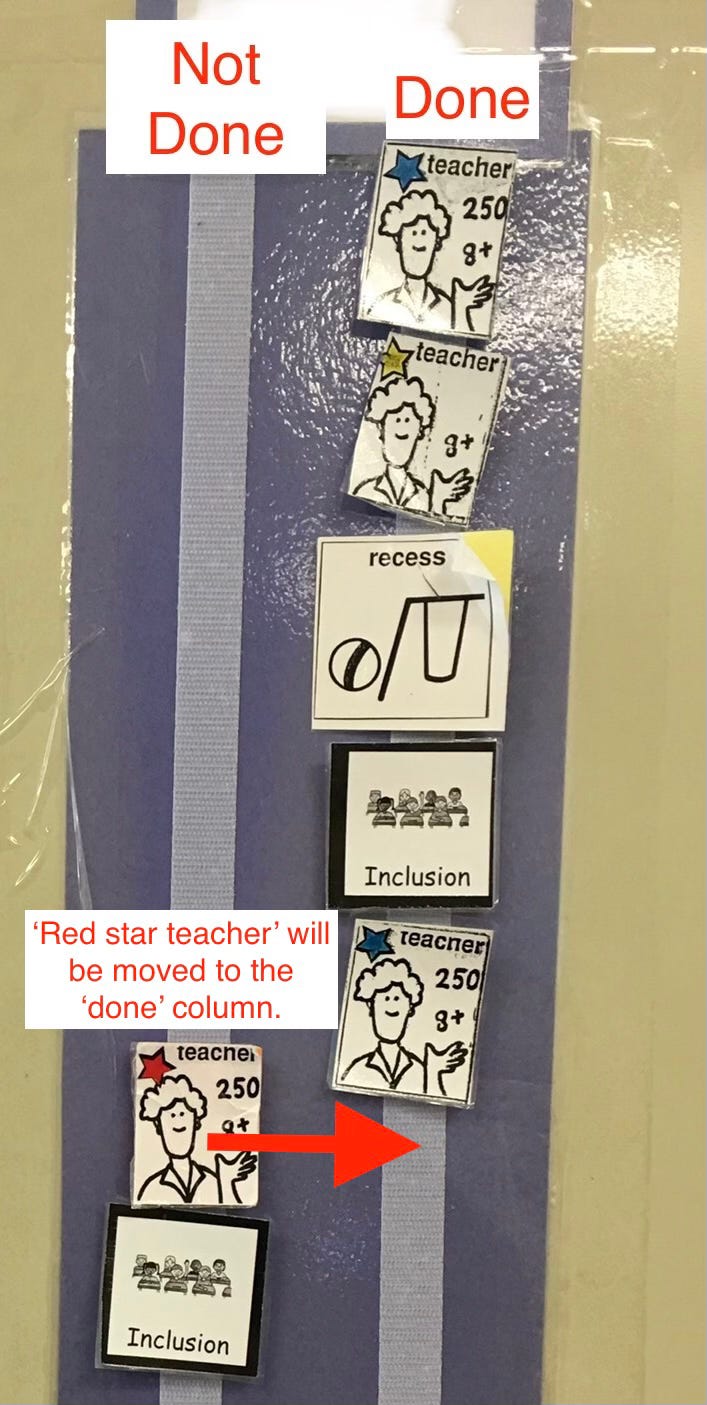
One important aspect of schedules is that the person can manipulate them in some way. When people can physically manipulate their schedule (by crossing out completed tasks or moving the icon for tasks), it helps folks to know that this item has been completed. It also helps to concretize the transition, which can reduce anxiety in people who need a lot of structure. These schedules are made so that picture icons can be moved from one column to the next. In my classroom, I referred to these columns as the ‘not done’ side and the ‘done’ side.
Instructions
1. First, create a backing for your schedule. I found that a 5-6-inch-wide cardstock or thin poster board worked best for 1.5-inch-square icons. If you are creating a schedule for an entire school day, the schedule will need to be 20-24 inches long to accommodate all of the icons.
2. Laminate the backing, OR stick strips of packing tape on the backing where you will place the Velcro. I found that Velcro doesn’t stick very well to paper. It sticks quite well to packing tape or laminated cardstock. I used the scratchy Velcro spots for the schedule backing. This way, my students were holding onto icons with a soft Velcro dot on the back. Make sure NOT to use the same texture of Velcro on the icons and backing, or your icons will not stick. I made this mistake once. Oops.
3. Stick two strips of Velcro vertically on the backing. The Velcro strips will need to be 2.5-3 inches apart from each other so that the people manipulating the icons can easily grab them without inadvertently grabbing adjacent icons.
4. Create icons. You can either print off photos of objects that represent an activity (such as a basketball for PE or letters for reading) or you can select appropriate icons from an internet service such as LessonPix.
5. Cut the icons out. Laminate for extra durability. Use packing tape for this if you prefer. (See photos below)
6. Put Velcro dots on the icons. If you put scratchy Velcro on the backing, use soft dots on the icons. You can cut the dots in half to conserve Velcro. When I did this, the icons stayed put during the day, were easily removable by my students, and it saved money.
7. Test out the schedule. Before you use this with the person for whom it was intended, assemble the schedule the way you want it. If it’s too short, too narrow, or if there are any other issues, this allows you to fix them before someone depends on it.
Instructions for laminating with packing tape (with photos)
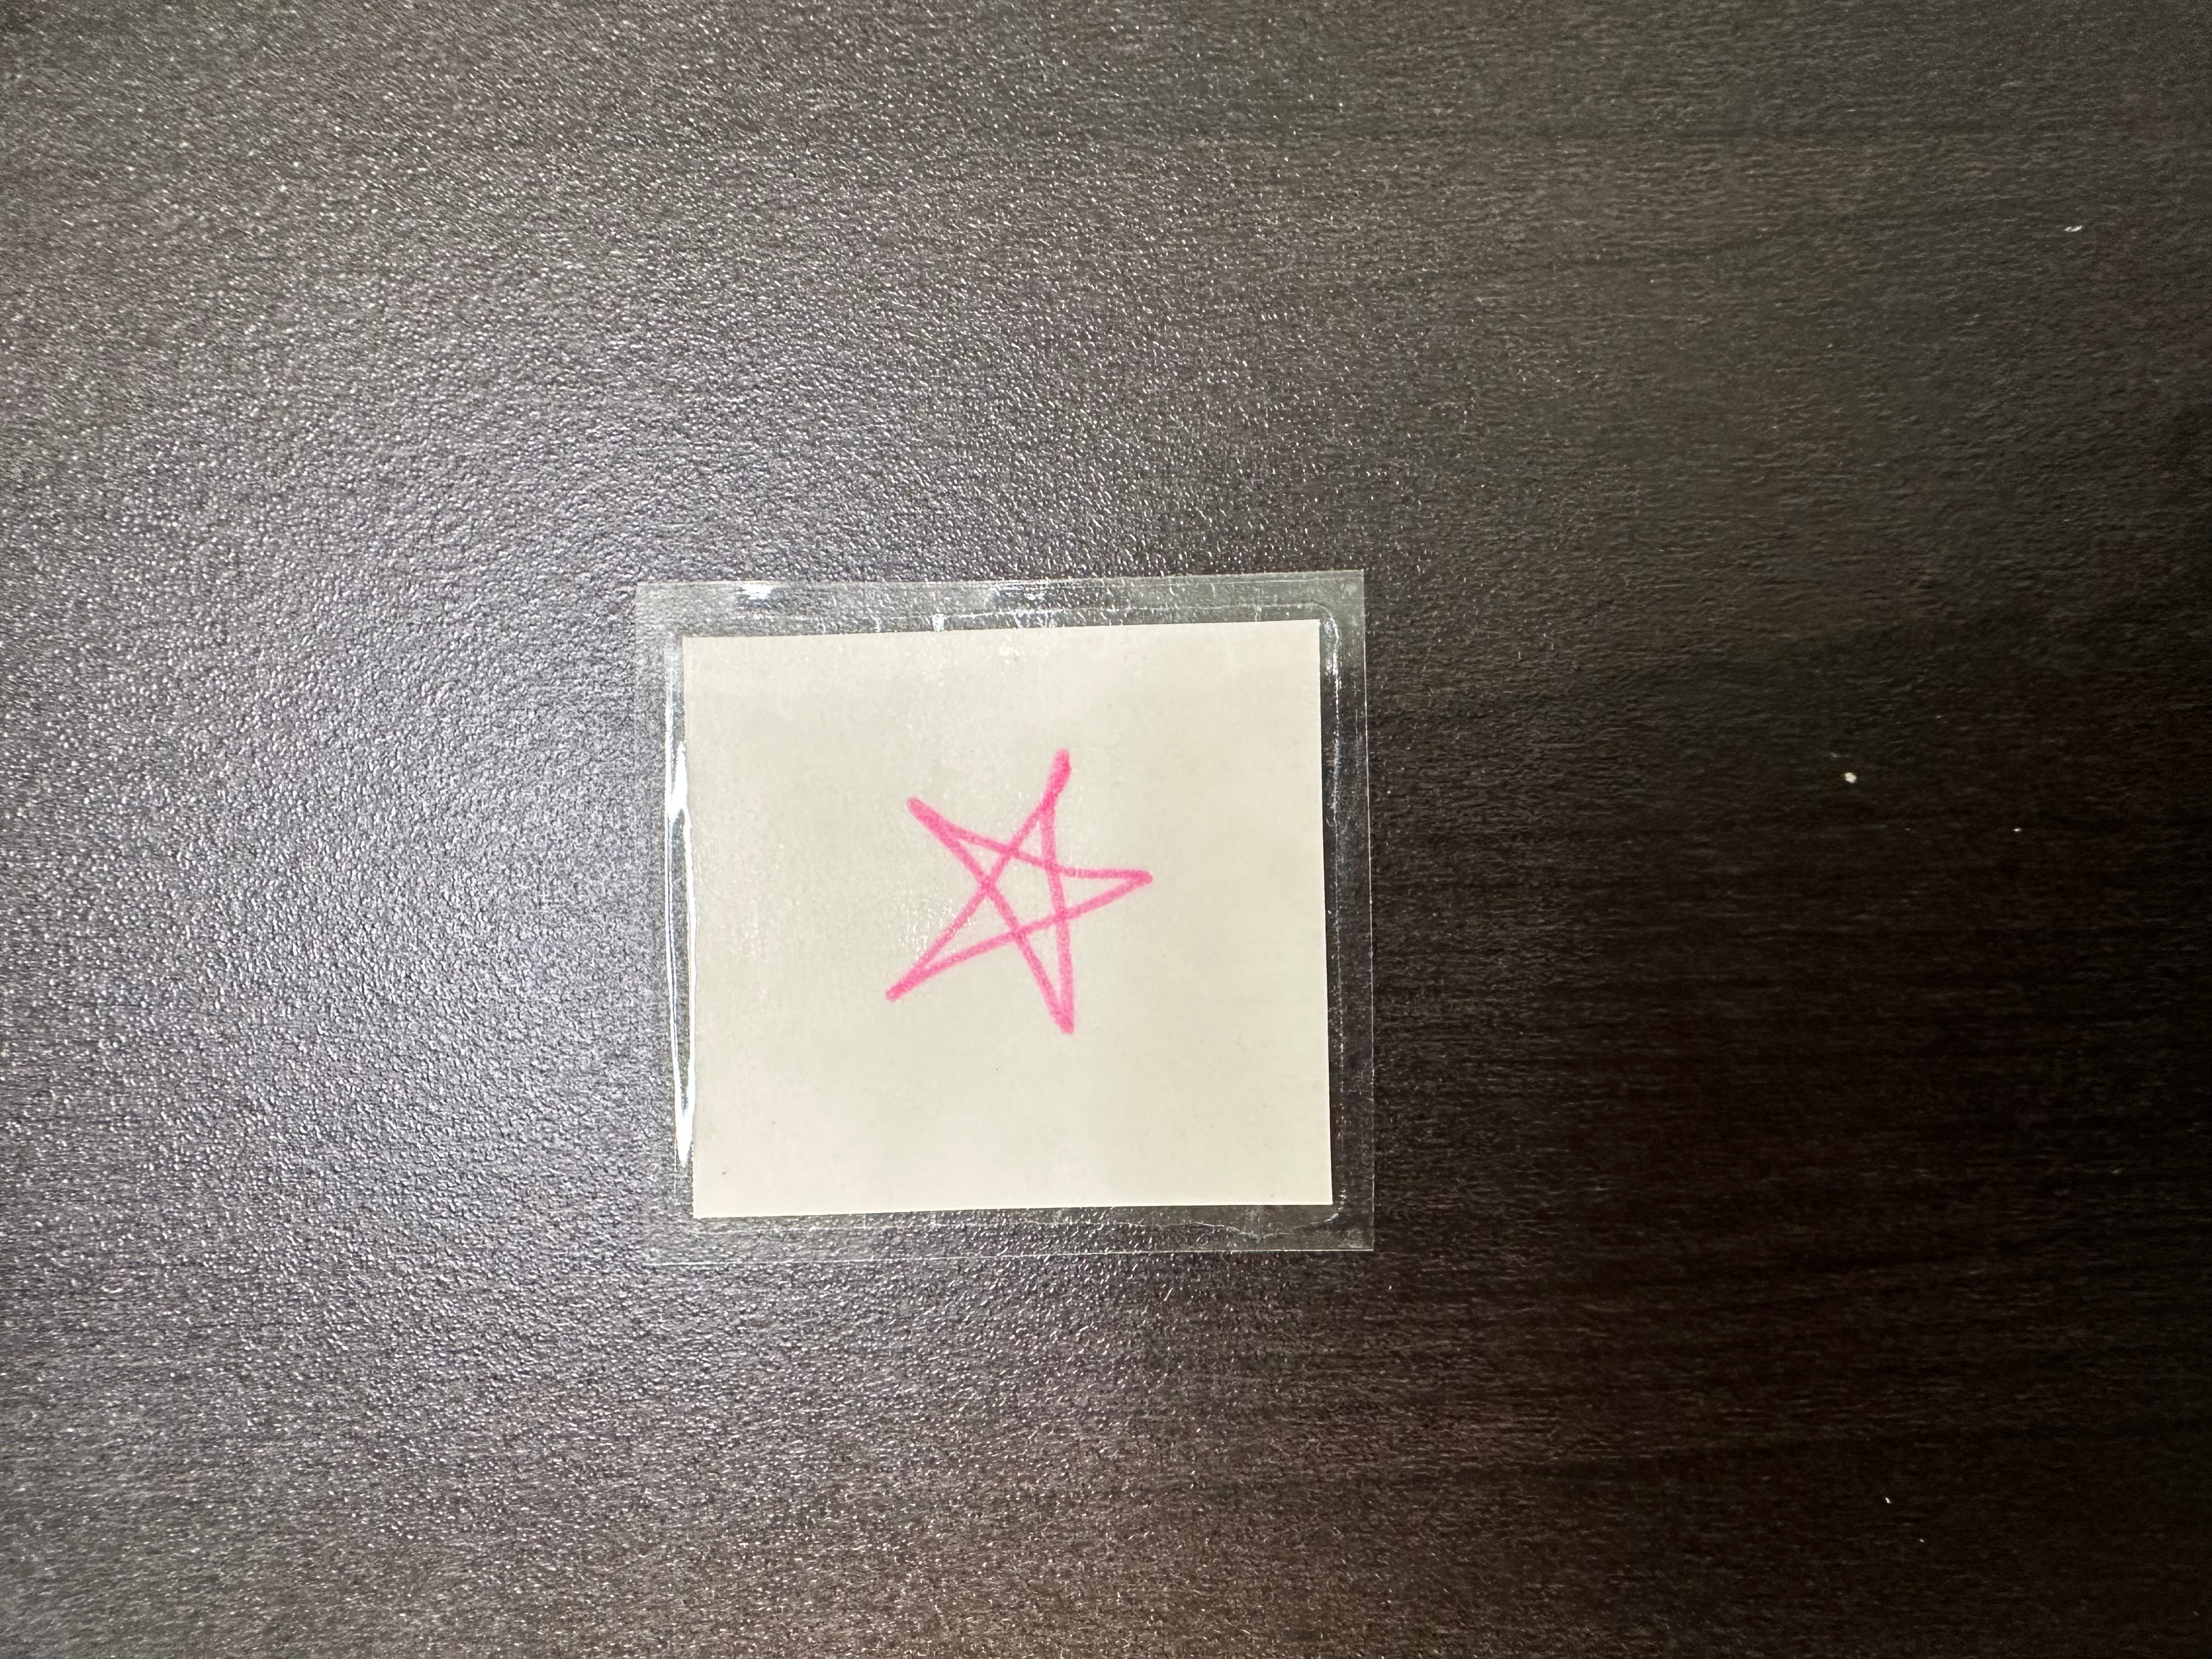
The sample shown is a 1.5’ square icon.
Stick packing tape to the back side of the icon.:

Photo by Elisabeth Neely Stick packing tape to the front side of the icon.
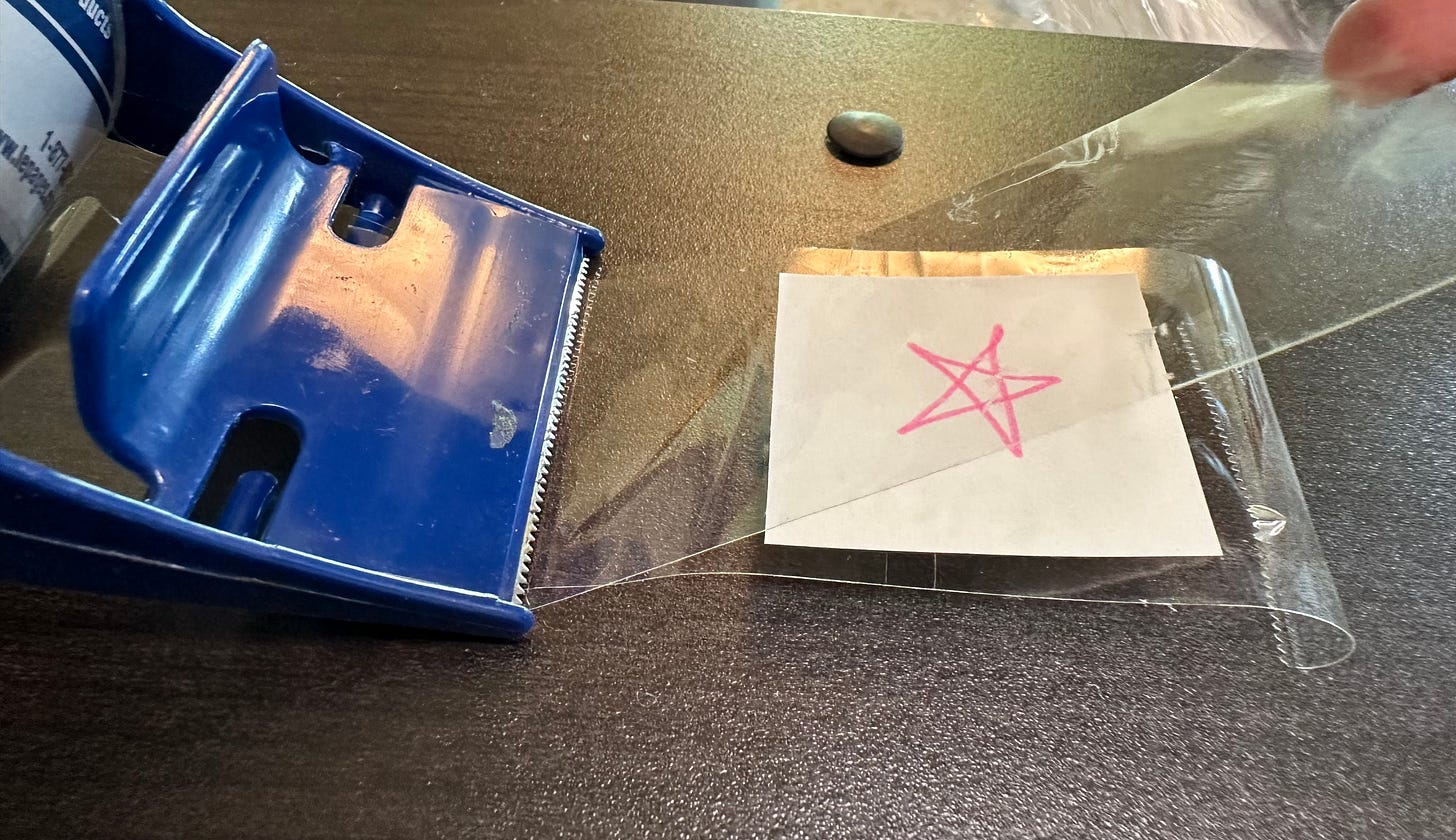
Photo by Elisabeth Neely Cut and trim.
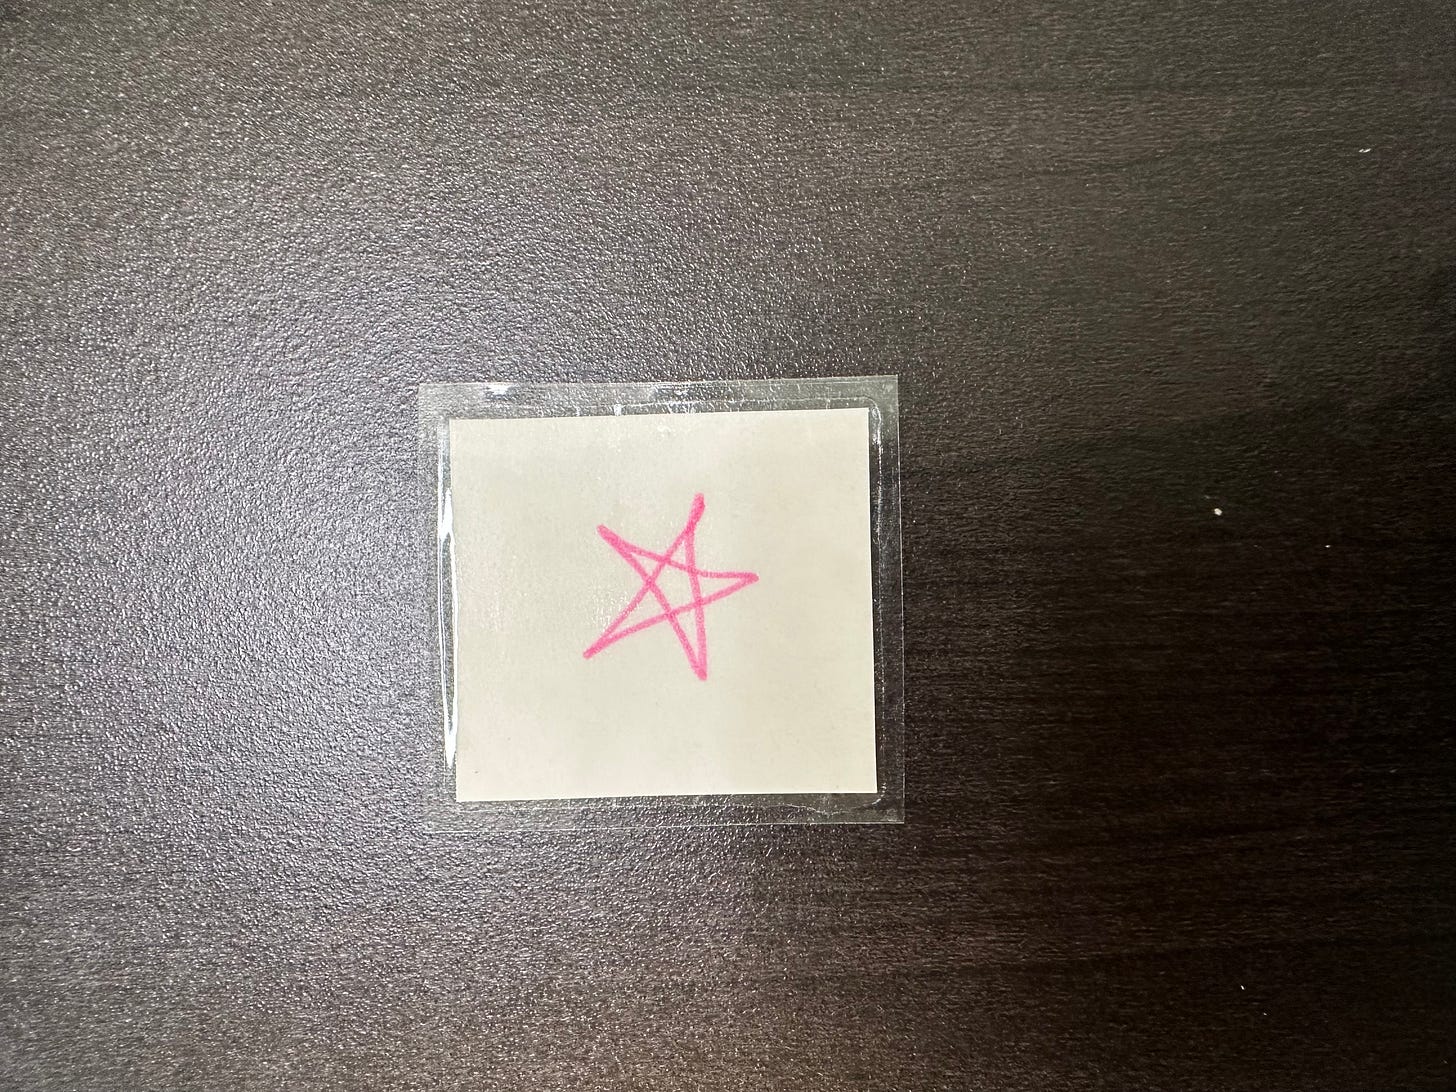
Photo by Elisabeth Neely

How students (or clients, residents, etc) use it
BEFORE an activity, the student will move the icon for the task they are about to do from left to right. For people who are learning how to read, moving the icon from left to right reinforces the direction in which reading English takes place. The icon is moved before the task is initiated because it keeps the task that is next at the top. If students were to move the icon after a task was completed, there could be some confusion about which task comes next.
To teach people to use this type of schedule, I prefer using verbal prompts along with pointing. I avoid hand-over-hand because I found that many students became extremely anxious when adults touched their hands and moved them. I have since heard from many disabled adults who said that they found it alarming for teachers to use hand-over-hand with them in school.
Here is an example of what I said to my kindergarten, first, and second-grade students when I was teaching them to use a visual schedule:
“Susie, this is your schedule. It shows you what you’re going to do today. First is math.” (I point to the math icon.) Put math here.” (I point to the right-hand column.)
If Susie moves the icon, I would then show her where math is taking place by leading her to the location. If Susie does not move the icon, I will move it for her and say,
“Time for math. It’s right over here.” I would then escort her to math.
Most of my students, even kids with intellectual disabilities and who were non-verbal, were able to move the icon themselves with a combination of verbal instructions and pointing to what I was talking about. Very few kids were unable to do this right away.
Variations
Shortened Schedule: I recently worked with a student for a half-hour lesson. I didn’t pull out my large schedules because that would have been overkill. Instead, I made this:
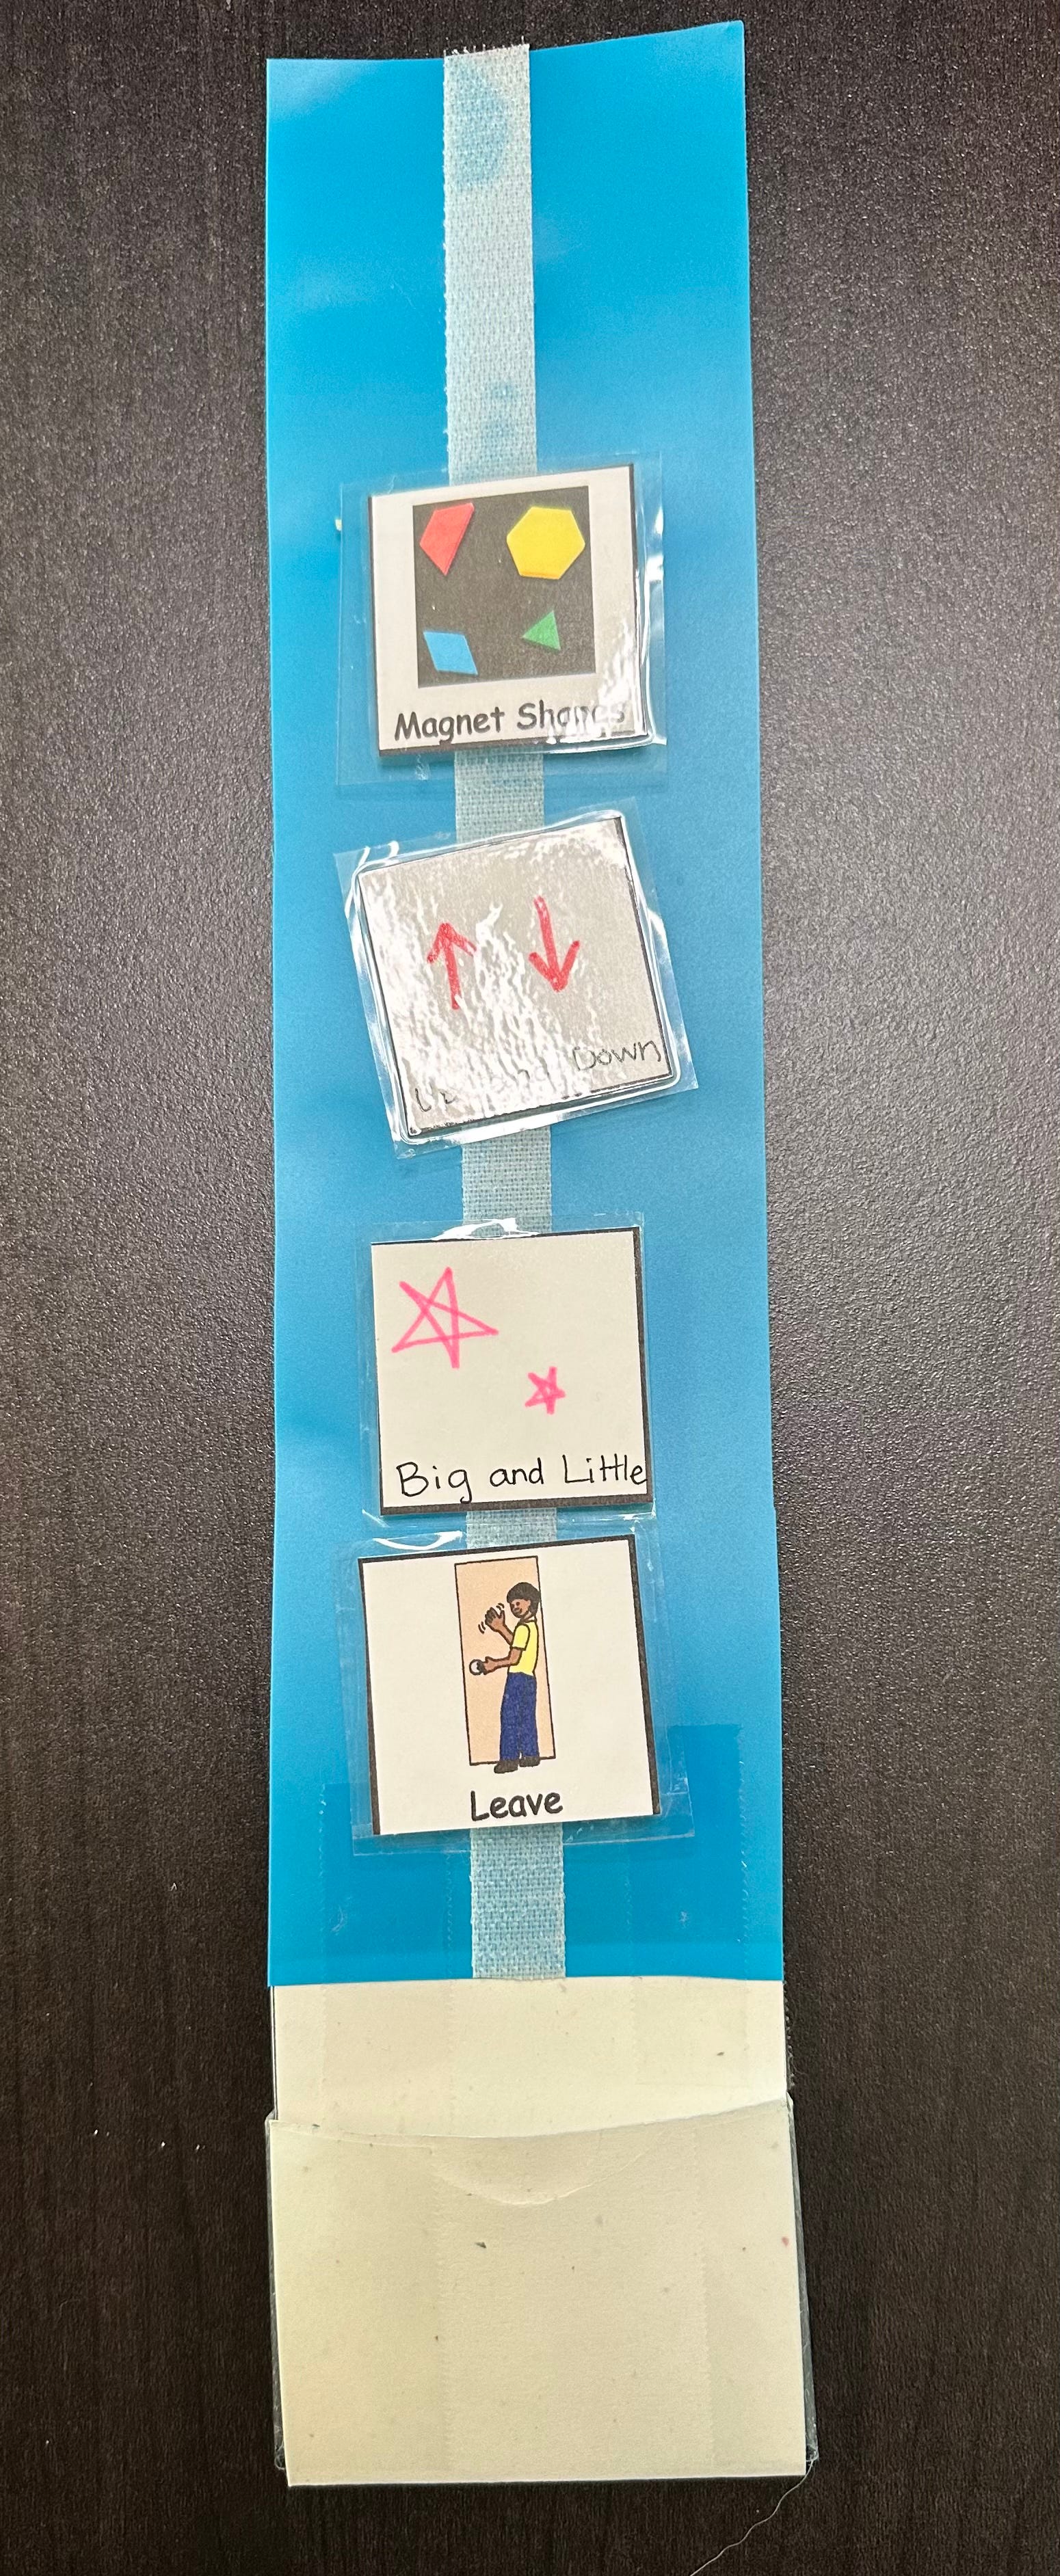
My student manipulated the schedule by removing the icon and putting it in the white pouch at the bottom. You can also use shortened schedules if a student has no trouble with most transitions, but struggles with others. For example, I had a student who did not want to transition away from playtime to lunch. I created a short schedule that consisted of playtime, lunch, and lunch recess that he could see that he was going to get to play again right after he ate. This helped to eliminate his episodes of crying right before lunch.
Written Schedule:
For older students and adults who know how to read, a written schedule is most appropriate. If the student or adult in question needs the structure of removing the task that they are about to do, you can put laminated words on the schedule rather than pictures.
Another option for schedules that do not change is to type out a schedule, laminate it, and allow the person to cross off finished items.
You can also insert a piece of paper or cardboard into a page protector and write directly on the plastic with a dry-erase marker. This is a very fast and easy way to create a schedule if the person needs to entirely erase the items as they go. It also allows you to conserve paper and gives you the flexibility of changing it at a moment’s notice.
For very quick schedules, you can write the next two or three tasks the person needs to do on a piece of paper, such as a sticky note, and have the person cross them off as they go.
Schedule with 3D objects: Some people with visual impairments or intellectual disabilities may not be able to use schedules with line drawings. People who are visually impaired may not see them well, and those with intellectual disabilities may not understand what the pictures represent. For these folks, having real objects that represent their tasks can help. For example, you can use a small ball to represent PE, a play sandwich for lunch, a small book for reading, a magnet number for math, etc. They can either remove the item for the task that they are about to do and put it in a bin, or take the item with them to their next task. Taking the item along to the next task is usually only necessary for very young children or those with intellectual disabilities. Taking the item with them helps them remember what they are doing and can provide additional structure to ease anxiety.
In Conclusion
Visual schedules are fantastic ways to add structure to the lives of people who need to know what’s going to happen next. If you are a parent or caregiver of a person with a disability or if you are a special education teacher, I strongly recommend using them, even if the person you help seems not to struggle with transitions. I worked with one parent who had not observed her child struggling with transitions. After talking with her, I noticed that some of the things she told me about her child suggested that they were having more difficulty with transitions than their parents realized. Once she began using a schedule at home, her child’s tantrums reduced significantly. Her child stopped procrastinating when it was time for bath time, and life at home became much easier. She later told me that, seeing how much her child’s behavior improved with the schedule in place, she could recognize the signs that I had seen that said he had been struggling with transitions.
If you’re a teacher, it has the potential to make your life SO MUCH EASIER. It can help your students to be more independent, reduce episodes of crying and/or tantrums, and free you up to do more of what you went into education to do: teach.
On June 23, I will be turning on paid subscriptions. On that date, this article will become available only to paid subscribers. Also on that date, I will turn on the chat feature. If you have questions about visual schedules, accommodations, or neuroplasticity, feel free to ask! I will respond to as many as I can. My visual impairment limits how much visual work I can do, so if I have a large number of questions, I will not be able to get to them all. But don’t let that stop you from asking! By asking and/or answering questions, you are participating in a supportive community. You will also have the opportunity to learn from others who participate in the chat as well, should they choose to respond to your question.